Here’s the complete Lost Lands 11 Chapter 2 Walkthrough [With Pictures & Collectibles].
![Lost Lands 11 Chapter 2 Walkthrough [ALL Collectibles]](https://www.mrguider.org/wp-content/uploads/2026/02/Lost-Lands-11-Chapter-2-Walkthrough-ALL-Collectibles.webp "Lost Lands 11 Chapter 2 Walkthrough [ALL Collectibles]")
Lost Lands 11 Chapter 2 Walkthrough
Chapter 2 Title & Intro: The Trials of the Big City – A young traveler is making his way home. Fate grants him fascinating encounters but also presents difficult challenges. The greatest of them all is the city that lies along his path. You can read the chapter 1 walkthrough here.
Scene: Forest
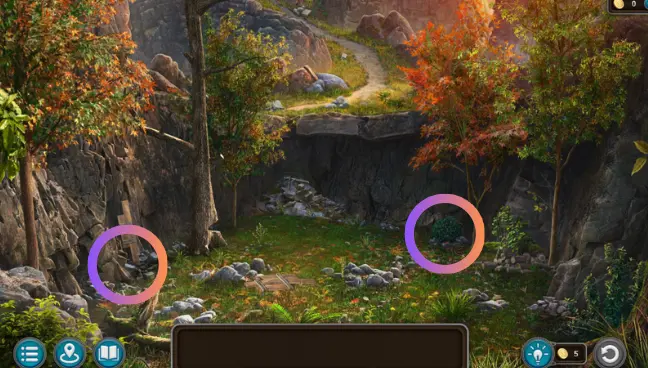
Chapter 2 begins at the forest location. Tap the debris area in the front, under the cliff and collect the valve and wooden staff. Look on the right side and there is a pile of wood and a tree stump behind the bush. You will get the ax from there.
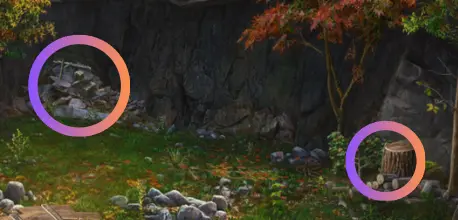
Cut down the left tree with the ax. Once done, the beehive will fall on the ground. Tap the beehive and collect the fragment of the part in the top-right corner.
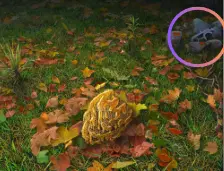
Once collected, tap the path at the top leading to the ruins.
Scene: Ruins
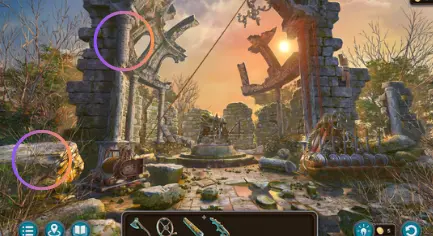
Tap the gear structure on the left; it would be jammed. Use the ax to unjam it. This will drop the chandelier on the ground. Tap it and collect the fragment on the left side. While at the same panel, tap the tile shard on the left and use it to cut the rope. From here, you will get a rope and tile shard.
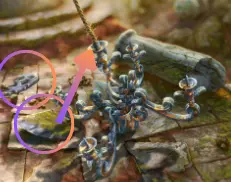
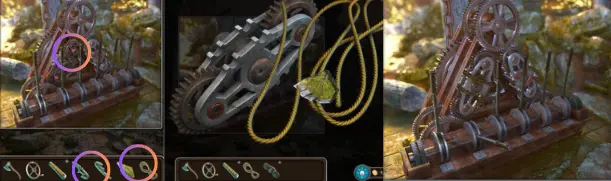
Next, we have to fix the levers on the right. Tap the gear structure on the right. Collect the broken part from it. Once the broken part is in your bottom inventory, tap it. Then use the two fragments and the rope. Cut down the rope into pieces with the tile shard. Tap again to bind the part with the rope. From here, you will get the repaired part. Use it to fix the mechanism with levers. Pull the lever number 4 – this will slide down the wall in the front.
Now go to the telescope in the center of the scene and tap the upper part to fix the lens. To progress further, you will have to solve a puzzle [adjust the telescope by connecting blocks with matching symbols in a line. To achieve this, rotate the segments and move the blocks into empty slots].
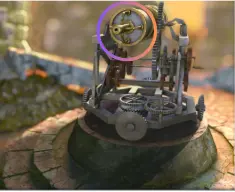
Take your time; rotate and move the blocks to solve this one. You can watch this video if you are having trouble solving this puzzle. 
Once all the pieces are in the correct place, use the valve from the inventory/toolbar at the bottom. Then look through the telescope and find the tower (you will unlock the tower of distance task from here).
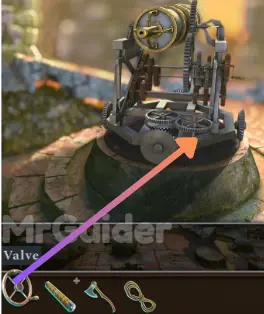
Go past the wall behind the telescope to the camp site.
Scene: Camp
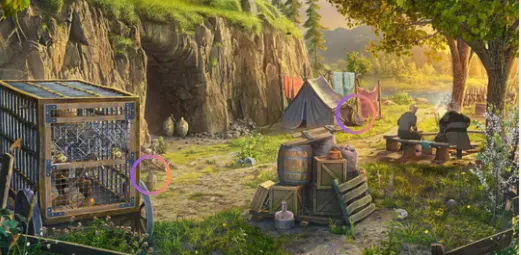
Begin by talking to the Minotaur in the cage. Enter the cave on the left and take the burnt-out torch hanging on the left. Exit the cave and then tap the cage; open the box near the cage and take the gauge. Put the gauge on the torch we just got from the cave. You will have a repaired torch from here.
Tap the crates in the center and use the ax to break the pot on the ground (when Minotaur sneezes). You will find the lamp oil inside this pot. Select the repaired torch from your inventory and dip it in the lamp oil. You will get an alcohol-soaked torch from here.
Head back to the previous scene (tap the round arrow icon on the lower-right) – Ruins. Tap the telescope in the center and put the torch on the side. Then tap again to move the telescope; this will start a new puzzle: connect the opposite sides of the mechanism with a chain of gears. All gears must be used. I have shared the puzzle solution screenshot below (though, keep in mind that this might be different for you):
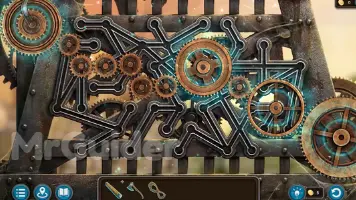
Once you solve this one, you will get a burning torch. If you are having trouble solving this one, you can watch the video here. Go back to the camp site and enter the cave. Use the burning torch to see inside the cave.
Scene: Cave
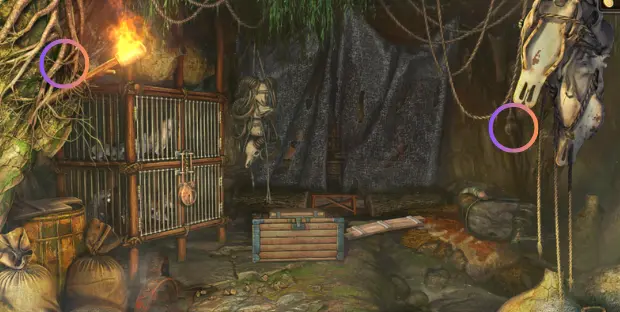
Begin by checking the person sleeping on the right as seen in the picture above. Below his blanket, you will find the note with sleep potion instructions [sleep potion recipe]. Tap the curtains in the center and behind these curtains, you will find a table. Put the recipe on this table. Take the following:
- Alcohol (front shelf)
- Pestle: Open the shelf door in the front and you will find it there
- Motherwort Root – open the bottom-right drawer of the shelf
- Gauze – top of the shelf
- Hypericum Seeds – left side, one of the vials
- Moonshine Berries – right side, bowl
- Rod – near the glass on the right
- Beardig Flowers – use the rod to open the lower-left drawer of the shelf, you will find the flowers inside this drawer
- Melissa Leaves – bowl on the left
- Syringe – tap the box on the left, solve the puzzle to get this item [solution below]
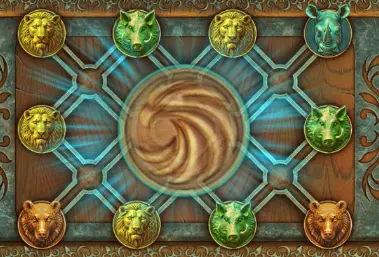
To get the syringe, you have to solve the box puzzle: move the tokens to their places. It’s pretty simple; all you have to do is move the token and see if it matches their slot. For example; lion token should be on the lion slot, the bear token should be on the bear slot, and so on. When you start the puzzle, you will find some of them are at wrong slots. Here’s the solution to the puzzle that I got (it might be different for you):
Once you have all the items, make the sleep potion:
- Put gauze first on the mortar/bowl
- Motherwort Root
- Moonshine Berries
- Beardig Flowers
- Melissa Leaves
- Hypericum Seeds
- Pour Alcohol
- Use the pestle to smash and grind the ingredients
- Tap the gauze to extract the liquid
- Use the syringe and you will have a sleep potion
Go back to the cave view and tap the person sleeping on the blanket. Use the syringe/sleep potion and turn him around. Take his keyring and check the notebook (his journal – featuring secret daggers and boat info). On the first page (secret daggers), take a look at the picture of the drawings on the left page and match the same to the staff you have in the inventory. From here, you will get the daggers.
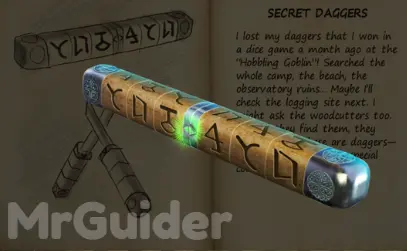
Go back to the camp site and tap the Minotaur cage on the left. Use the key ring to unlock it. [Tap the cage -> view -> tap again -> and use the key ring]. Once you use the key, a puzzle will begin: open the cage by pulling out all the blocked bars. Just slide the bars one by one. Hand over the ax to Minotaur and he will start chasing the poachers and you will have a clear path. Head to the lake side in the front.
Scene: Lake
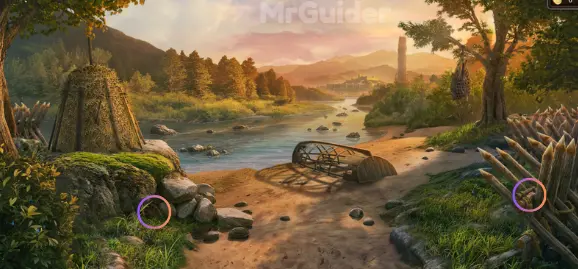
Begin by tapping the broken boat in the center and take the two boat parts on its side. Tap the tree on the right – the one with a net. Use the dagger to cut it down. Once you cut the net, a few items will drop on the ground; take them all (shovel, paintbrush, scoop). Tap the haycock on the left and take the pitchfork. Head back to the cage/camp site and get two boat parts(one is above the barrels in the center and the other one is on the left-hand side of the cave entrance). Now, you have 4/10 boat parts.
Next, tap the area on the right where poachers were sitting and smoke is coming out. Get the hammer from here (toolbox, near the coal/smoke point), cauldron, and use the scoop to get hot coals. Enter the cave and collect two boat parts(one is near the chest in the front and the other one is on the barrel on the left). Now, you have 6/10 boat parts. While in the cave, tap the cage on the left and use the key ring. Open the cage, free the animals, and take the nails from the cage.
Head back to the ruins scene where we used the telescope. Get two boat parts(one is in the center, on the ground, and the other is on the right-hand side pillar). You have 8/10 boat parts at this stage. Go back to the forest where we began (the starting scene). Get two boat parts(one is on the left-center/grounded, and the other is in the center, near the stone/rock). That’s it, now you have 10/10 boat parts. Keep in mind that boat parts locations might be different for you, but you will find them in the same scenes at different locations; just look around.
While at the same forest scene, tap the beehive in the center and drop hot coals on it. Use the cauldron and pitchfork to get the wild hive. Tap the location icon in the lower left and head to the boat scene/location. Tap the boat and use all the boat parts, hammer, and nails. Once you drop all three of these, tap again to begin the puzzle: Arrange the planks on the boat without leaving any gaps. Front Side:
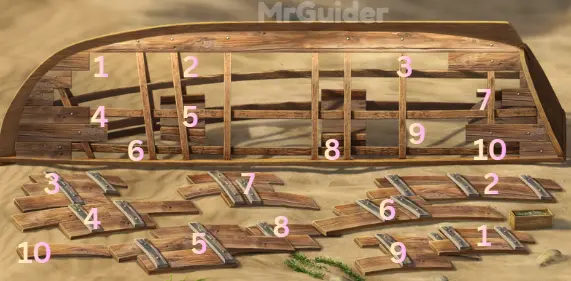
Second Side:
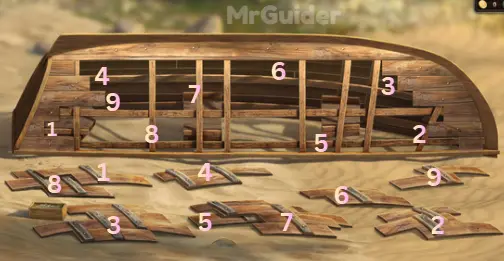
Once the boat has been fixed, head back to the cave. Tap the table on which we made sleep potion. Put the wild hive on the table. On the left side, there is a presser. Use it to extract the honey from the wild hive. Once the honey has been extracted from the wild hive, get the wax from the presser. Put the wax in the cauldron. Just tap the presser to get things done. Take the wax to the camp site where the smoke is coming out. Put the cauldron on the fire and let it melt. Take the melted wax. Go back to the lake side. Tap the boat and use the melted wax and paintbrush to coat the boat. Once the coating is done, tap the boat and Minotaur will come to assist you.
Once the boat is placed in the water, tap the area where it was stranded and broken. Use the shovel to dig the ground and get oars. Select the oars from the inventory at the bottom and place them on the boat. Tap the boat to begin the puzzle: press the arrows to steer the boat and cross the river. If the boat hits an obstacle, the game will start over. It’s pretty easy to do.
Scene: Greylmar
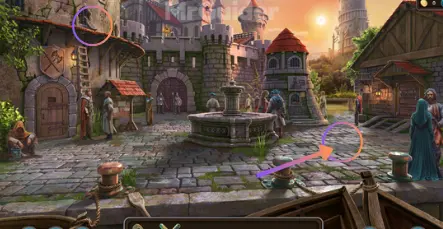
Begin by tapping the quest/note board on the left. Take the riddle note from there. Select the riddle note and tap the sun to get the riddle code [25134]. After this, you will get a riddle notice. Tap the exchange office building in the center (the one with the red top). Interact with the lady at the exchange office and get the lunch bundle. Tap the knight guards guarding the building on the left, and give the lunch bundle to the guard. He will give you five iron kyolls and a flower as the reward. Go back to the exchange office building and give the flower to the woman and she will give you a charcoal stick.
Select the riddle notice and tap the sun side. Use the charcoal stick to write down the code [25134]. Note down the symbol and the code. Tap the door on the right. Use the riddle notice and knock on the door as many times as the clue number says [25134]. Twice for the first symbol, five times for the second, one time for the third, three times for the fourth, and four times for the fifth. Go inside the building once the door is opened.
Scene: Grilur’s Building
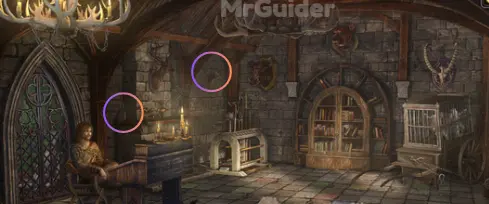
Talk to Grilur and get the instructions on the task. Go back to the cave and tap the chest. Put the instruction on the chest. A new puzzle will begin: rotate the polygons using he buttons with arrows and place the tokens according to the hint. Note down the patterns on the instruction and follow the same pattern on the chest.
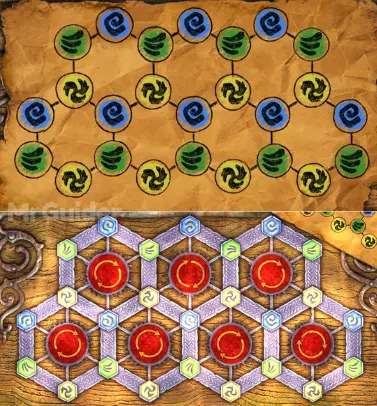
Once you solve the puzzle, the chest will open. Take the precious box, pouch, and screwdriver from the chest. Tap the sleeping ranger on the right and use the rope to tie him up. Once you tie him up, tap again to take him with you. Select the pouch from the inventory and cut it down with the daggers. You will find the gold kyolls and heraldic seal inside the pouch. Tap the location icon in the lower-left corner and head to Greylmar. Once you are there, tap the fountain in the center. Use the screwdriver to open the grates. Find 15 iron kyolls inside it.
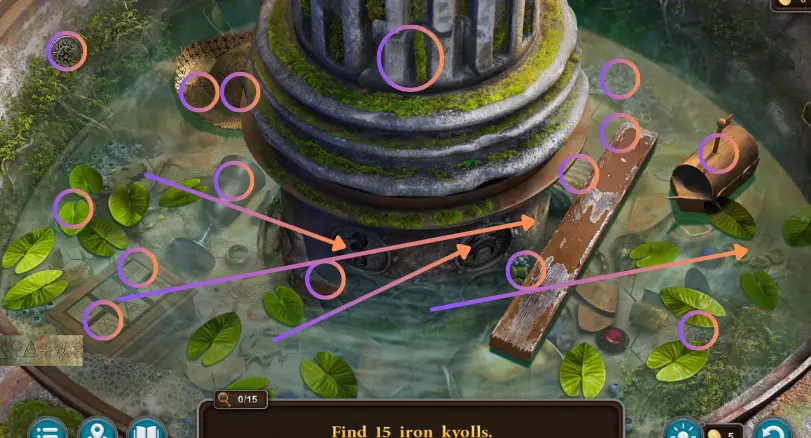
For the top coin, you will need to place the symbols in their designated places (I have marked them with the arrows). The coin below the shell is stuck. Use the fork near it to lift the shell and take the coin. There are two coins inside the box. To open the box, check your hint on the side of the fountain; it’s engraved there. Note down the engraved symbols and then tap the box and press the symbols in the order that you got from the engraving. Now you have a total of 20 kyolls.
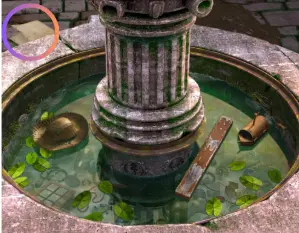
Go to the exchange office building, give the 20 iron kyolls to the lady and she will give 2 gold kyolls in exchange.
Head to Grilur inside the right building and put the sleeping ranger in the monkey cage, you will get another 2 gold kyolls. While in the same room, tap the box and try to open it. It’s locked. Continue the dialogues and you will get the Grilur box. Give it to Grilur for 6 gold kyolls.
Head back and tap the door on the left. Use the 20 gold kyolls to enter the arena.
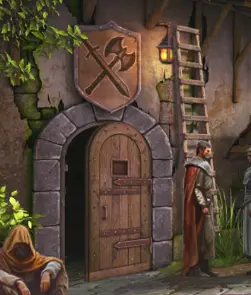
Scene: Arena Lobby
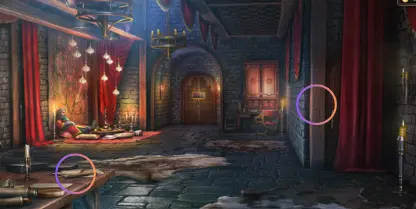
Begin by talking to the owner on the left. Go back and head to Grilur inside the right building, though he won’t be there now. Tap his desk on the left. Open the right drawer and use the key to open the big one. Inside it, you will find the box that we gave him. Take the precious box back. While in the same building, tap the armory in the corner and take the mechanism lever. Go back to his desk, select the mechanism lever and then tap the gear box inside the opened desk drawer. This will open the back room, behind the desk. A puzzle will begin: assemble 5 suits of armor by moving their pieces between the mannequins. You can’t move a piece if there’s another piece of armor on top of it. Here’s the solution to this puzzle;
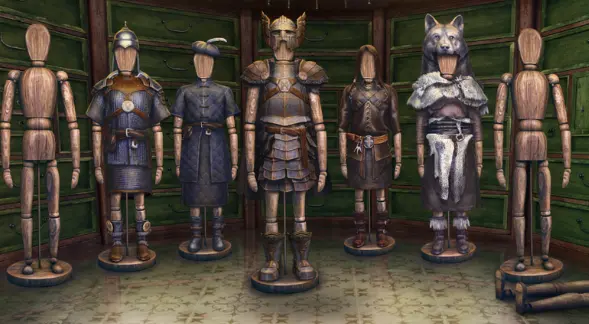
Take one armor suit at a time and assemble it. Then move on to the other one. Once you solve this puzzle, you will get a key. Take the key from the floor and head back to the previous room. Use the key to unlock the locks on the chain holding the cage. Head to the campsite and tap the ranger in the cage and ask him for the code. He will tell you the location of it [right side, there is a plant with white flowers. Tap the grass under it and you will find it was dug up fairly recently]. Go to the lake scene where we fixed the boat and grab the shovel in the center. Go back to the camp scene and use the shovel to dig the ground. You will find a note with a code.
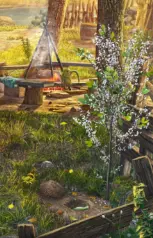
Select the box from the inventory/toolbar at the bottom and use the note with a code. A puzzle will begin: press the buttons in the correct sequence using the hint from the code. You need to press the buttons in order and then the mechanism will unlock and a new puzzle will begin. The code on the note has four symbols and the last one is torn apart. You need to guess the last one; so first follow the order on the code and press another button with a guess. If that does not work, go back, tap the box, follow the sequence on the note and this time, try another button. And, if that does not work, the last one will definitely work as that’s the remaining one. You can watch the video here.
Once all the buttons are pressed down, a new puzzle will begin: Move the blocks to clear the way and slide out the hook-shaped block. You can watch the video here if you are having trouble solving this one. Once you have unlocked it, use the heraldic seal to open the box. Read the contract note and take the mysterious artifact. Use the key to free the ranger.
Go back to the Greylmar-Lake City and head inside Grilur’s building. Tap the bookshelf in the center of Grilur’s room. You will find the book on the second shelf. Take the template from here. Furthermore, learn about the bear gum from the book. Open the box from the bottom inventory/toolbar and use the template. You will get a secret code from here.
While in the same room, tap the armory in the corner and tap the weapons. Use the secret code to start the puzzle: enter the symbols according to the hint on the secret code. I have marked the symbols in order from A to G. Press the buttons in the order to solve this puzzle.
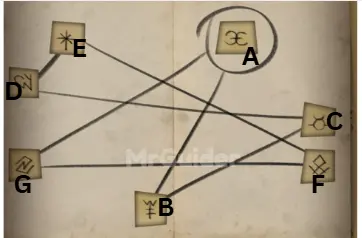
Once you solve the puzzle, get the mace from the armory. Go back to the Greylmar-Lake City and head to the building on the left where we met the arena owner. Enter the door and participate in the arena. Press the arrow buttons to navigate. I have shared the walkthrough below:
- up x 3 times – left x 2 times – up x1 time – left x 3 times – down x 2 times – left x 3 times – up x 2 times – left x1 time – up x1 time
You will find a prize chest. A new puzzle will begin: match the images that have the same meaning.
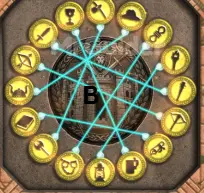
Once you solve this one, proceed further:
- up x1 time – right x1 time – up x 3 times – right x1 time – up x 3 times – right x 3 times – down x1 time – right x 2 times
You will find another prize chest. Tap the chest. A new puzzle will begin: restore the relief by swapping its fragments. You can tap two pieces and switch them with each other. Place them all in their designated spots.
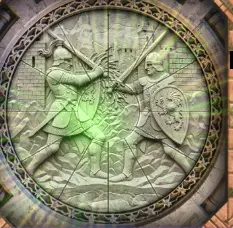
Proceed further
- right x 7 times – down x1 time – right x1 time – down x 4 times – left x 2 times – up x1 time – left x1 time – up x1 time – left x 3 times
You will find the third prize chest. Use the mace to begin the puzzle. Assemble the shapes using the fragments in the center. Just drag the pieces to the correct shape and place.
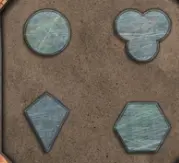
Proceed further:
- left x 4 times
Tap the chest and begin the puzzle. Move the blocks onto the highlighted cells within the given number of moves. Just drag the pieces to the spots within the given number of moves. You have to do this three times.
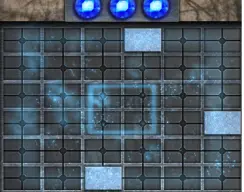
Once you win, you will find that you have been betrayed and it’s time to escape.
Scene: Barn
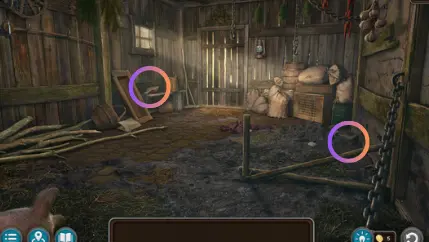
Begin by tapping the chain on the right and take the bird figurine. Take the short stick with a nail in the front. Use this short stick to reach the left stick on the ground. Use that stick to get the fishing rod hanging on the left-side wooden wall. And, at last, use the fishing rod to get the oil lamp in the front. Tap the chain on the right and use the oil lamp on your hand to free yourself from the chain. Tap the door in the front and you will find it is locked. You will find the manuscript on the ground[left side, near the basket].
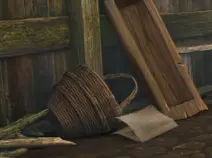
Next, tap the window on the left and use the weight to break it. You must check the door first to use the heavy weight. Once the window is broken, take the glass shard from there. Tap the burlap sacks on the right and take the second bird figurine. Go to the door and use the glass shard to unlock it and get outside.
Scene: Yard
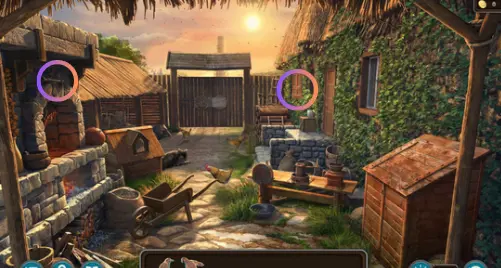
Begin by checking out the cupboard on the left. Inside it, you will find; daggers, a mysterious artifact, a mace, and the barn lock. Tap the table in the front and take the bird figurine from the ground.
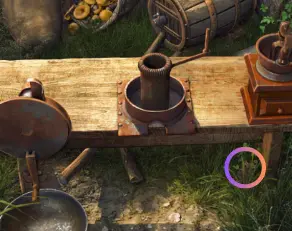
Check the left-side oven and take the bird figurine from the bowl. Go to the dog house on the left and tap the window to detach it. Tap the handcart in the center and go back to the barn. Use it to place the burlap sack/heavy bag on it and take it in your inventory (cart with a sack). While you are there, tap the box near the bag to take the blacksmith’s tongs.
Head outside and take the roasted ribs using tongs from the oven on the left. Throw the ribs inside the dog house from the window and use the cart with a sack once the dog goes inside to eat the ribs to block the entrance. Tap the door on the right and lock it with the barn lock. Near this door, you will find a bird figurine in the plant pot.
Tap the front door of the yard and put all five bird figurines on the door’s tree object. Tap the right-side object to begin the puzzle: place the chips in their correct positions. Use the arrow buttons to move the chips in the indicated direction.
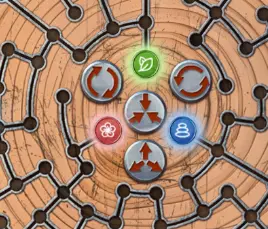
Scene: Outskirts
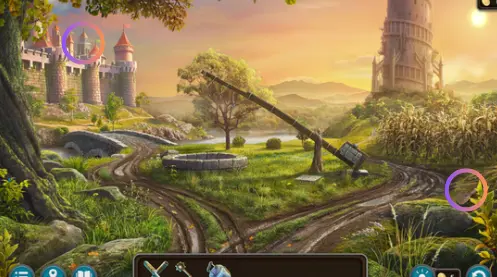
Begin by taking the right path to the tower on the right.
Scene: Tower Side
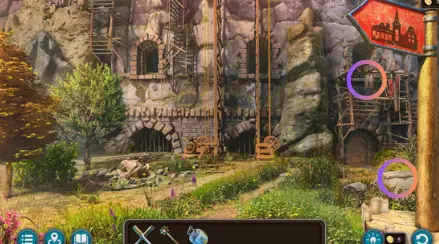
Begin by checking the gear mechanism in the front and taking the brakes off. Use the elevator to go up.
Scene: Tower-Top
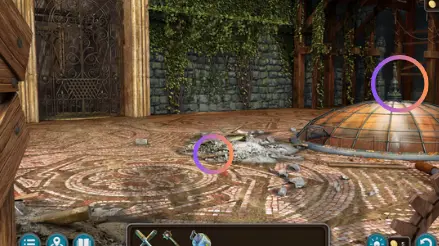
Check the door on the left. On the side of it, tap the vines and use the dagger to cut them down and you will find a secret door. Check the window on the right side of the dome and go downstairs.
Scene: Chamber of Balance
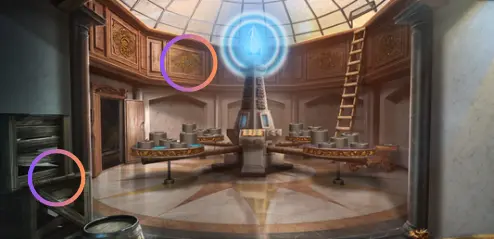
Check the book in the center for the information about the stabilizer. Head back to the tower side where we took the elevator. Tap the gargoyle on the left on the ground. Use the stick to turn it around and then smash it with the mace and take the gargoyle head.
Take the elevator and go to the tower top/dome. Tap the secret door behind the vines that we cut down using the daggers and place the gargoyle head in the center to begin the puzzle: activate the symbols in the correct order. You saw the hint earlier in the game (the book in the chamber of balance). Start from 01 and follow the sequence shown in the book that we found in the chamber of balance.
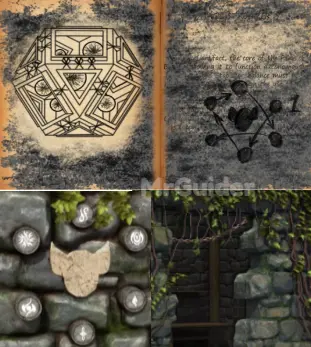
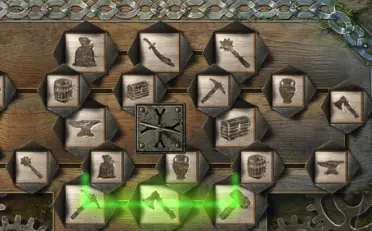
Check inside the secret room and take the antidote recipe and the storage key. Now, you need to gather all the materials. Go back to the tower-side outskirt where we had just smashed the gargoyle. Tap the door on the right and use the storage key to begin the puzzle: find all pairs of images. The windows will close if the pair is guessed incorrectly.
Head inside the storage room and use the antidote recipe. Then find all the components listed.
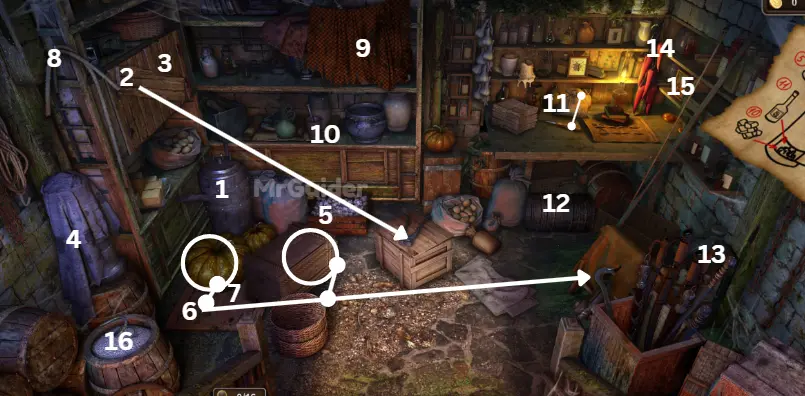
Once you find all 16 components, you will be rewarded with the antidote kit. Use the elevator and go to the top and enter the secret room behind the vines. Put the antidote recipe on the table. Use the recipe on the right of the table and make the antidote step-by-step. [Cut down the pepper with the daggers].
Tap the location icon in the lower-left corner, select the tower and outskirts on the right and choose the yard location where we trapped the dog. Talk to Grilur and get Grilur’s Key. Tap the cupboard on the right of the yard scene and get the file in the corner. Select the file from the bottom toolbar/inventory and tap the window on the right. Talk to Grilur again and get the Hunting Lantern. Head outside and tap the stopper in the middle. Use the key (Grilur’s key) to pull it down. Tap the well and then the rope/hook. Go back and tap the stopper again and use the Grilur’s Key to get the bottles.
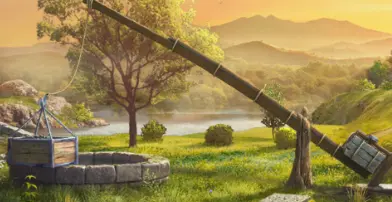
Select the antidote and use the bottle. Tap the location icon in the lower-left corner, choose the forest on the right and select the campsite where we found the minotaur in the cage. Tap the minotaur cage and put the hunting lantern inside it. Open the lantern and put some fur inside it (you will find the fur inside the cage). A new puzzle will begin: set up the lantern by placing the chips with the indicated symbols in each column. The top row should remain empty. All you have to do is make matching columns; each column with the same color chip; 3x for each column. It’s a painful task and honestly, the hardest puzzle of this chapter. If you are having trouble solving this one, use the 25 coins to skip it.
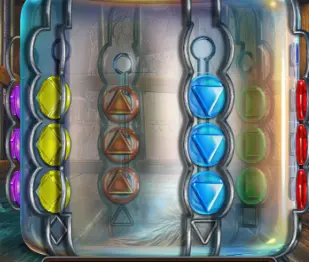
Once the puzzle has been solved, the lantern will start glowing, tap it and save it in your inventory. Head to the arena lobby room where we met the owner and use the glowing lantern to find Minotaur and get the key. Use this key to open the cupboard in the right corner in the same room. You will find a manuscript in this cupboard. Inside the same cupboard, you will find the bag full of kyolz. Check the mechanism in the corner of the shelf inside the cupboard. Head to Grilur’s room/armory, where we found the book and the mace. Check Grilur’s desk and take the mechanism lever. Go back to the arena lobby room and look inside the cupboard again, tap the mechanism, and use the lever on it to unlock the hatch.
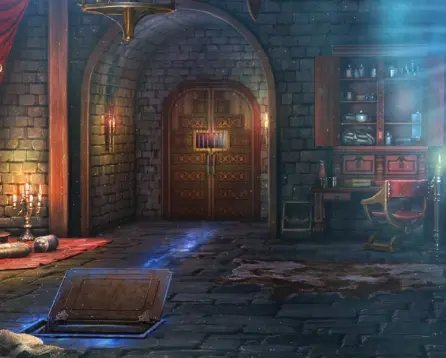
Check the hatch and you will find that there is no way to go down without a ladder. Go outside the arena lobby room and tap the ladder on the left. Use it to go down the hatch door in the arena lobby.
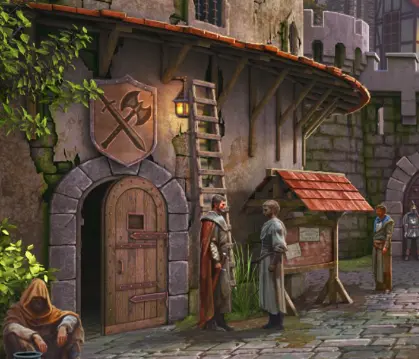
Take the pillows on the left of the arena lobby room where the owner was sitting. Drop the pillows in the hatch door for a safe landing. You will find Minotaur is being trapped here. Using the levers, activate the crystal at the top according to the hint on the sides. First, tap the lever and then the arrow to get things started, tap the arrow again to stop the handcuff bar at the right time. You can see the sides with clues; 6, 1, 4, and 3, 5, 2. You have to stop the bar in the order; first at 1, then 2, 3, 4, 5, and at last 6.
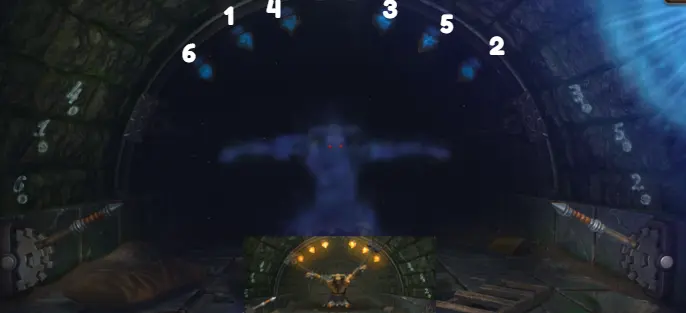
Use the antidote on the Minotaur. Next, get the lockpick from Minotaur’s horn. Use the lockpick to free him from the handcuffs. Use the mace to break the wall behind him and he will assist you in breaking it.
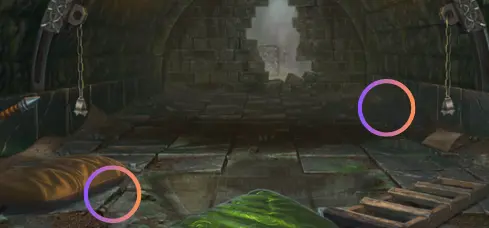
Scene: Abandoned Sewer
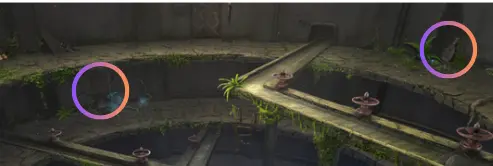
Begin by checking the door in the front. It is locked. Read the note on the side of the door. Take the valve from the ground near this door. Next, go down on the left where the ladder is. Use the valve on the left slot and take the other valve on the right. This will open the gate and water will start flowing.
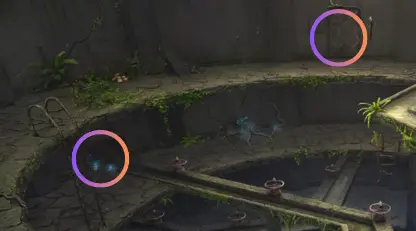
Tap the broken ladder on the right; it’s necessary otherwise you won’t be able to take the ladder from the prison room where Minotaur was captured. Go back to the Minotaur captured scene and take the ladder. Use this ladder to replace the broken one and go down there.
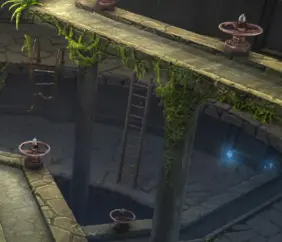
Tap those glowing mushrooms to look there. Use the valve on the left slot and then the dagger to keep the door open. Go back to the prison room and take the golden color pillow. Put it on the right side where water is flowing down. Use the dagger to cut down the pillow. Put the feathers into the first lane, on the right.
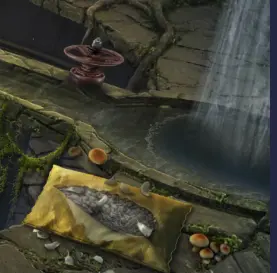
A new puzzle will begin: follow the flow and turn all the valves in the correct order. Note down the path where feathers are flowing and tap the valves in that order to solve this puzzle. There are 12 valves and you need to tap them in order. That’s why it’s important to note down the feathers’ flowing path. You can tap the pillow again to check where feathers are going.
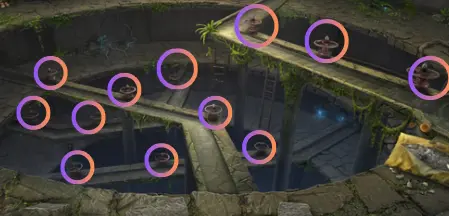
Once you solve this puzzle, the door will open. Take the torch and go inside. You will need to make your way out of the maze
- Up 2x – Right 4x – Up 2x – Right 3x – Up + Button
- Down – Left – Down 4x – Left 2x + Button
- Right 2x – Up 4x – Left 2x – Down 2x – Left 4x – Up 2x – Left 4x – Down 4x – Left 3x – Up 2x – Right 2x + Button
- Left 2x – Down 2x – Right 3x – Up 4x – Right 2x – Up + Open Door
- Up – Right 2x – Up – Left – Up – Right – Up – Right + take Key from the Chest
- Left – Down – Left – Down – Right – Down – Left 2x – Up 2x – Left 2x – Up + use the key
- Up 3x – Right 2x – Up 2x – Left 4x – Down – Left – Down 2x + take the shovel
- Up 2x – Right – Up – Right 4x – Down 2x – Left – Down 2x – Right 7x – Up 2x – Right 3x – Down 5x + Use Shovel to get Key
- Up 5x – Left 3x – Down 2x – Left 4x – Up 3x + use the key
Scene: Maze Exit
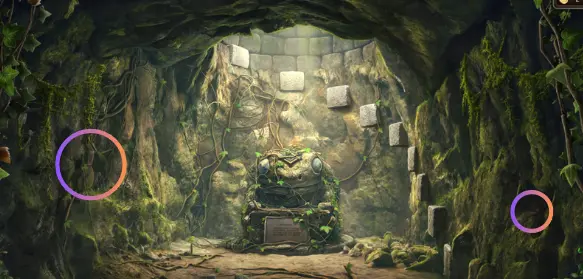
Begin by reading the note on the frog statue. Use the dagger to cut the vines on the frog statue. Press the button on the frog’s head and throw some coins out of the bag you have. Tap the statue again and give him more kyolls. Tap again and throw the entire bag. Exit the well. Head to Grilur’s armory where we got the mace. Tap the bookshelf and use the lockpick to open the door. Take the ranger’s diary with the bear gum recipe.
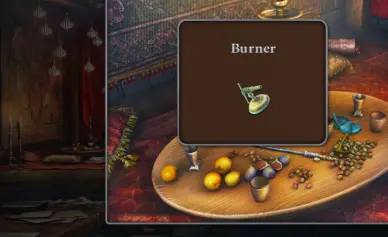
Head to the arena lobby where we met the arena owner. Take the burner on the left side where we got the pillows.
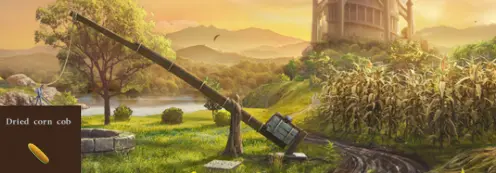
Head to the outskirts and take the dried corn cob from the field on the right side. It will be on the ground once you look around there.
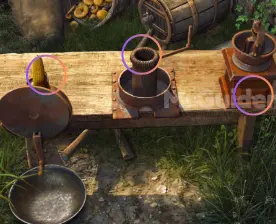
Head to Grilur’s residence where we trapped the dog. Use the three tools on the table on the right to make corn flour.
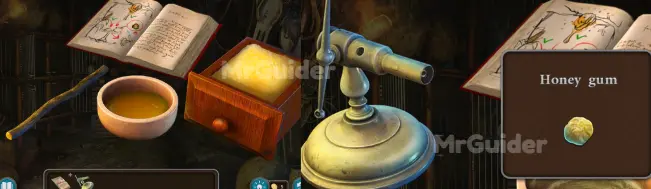
Tap the location icon in the lower left and choose the forest on the right and select the campsite scene where Minotaur was in the cage. Then go inside the cage and check the table in the front. Take the Wild Honey we made earlier. Next, tap the diary from your inventory at the bottom. Now you have all the items to make bear gum. Put in the honey and corn flour. Select the diary/recipe again, tap the corn flour and put it in the honey bowl. Use the stick and then the burner to get honey gum.
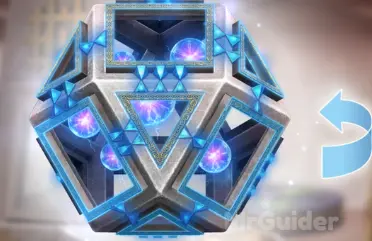
Tap the location icon in the lower left and choose the towers and its outskirts on the right and select the Chamber of Balance scene. Select and view the book in the center of the structure. Use the honey gum on the book to remove the charcoal. Select the crystal/artifact object in the middle, near the book. A new puzzle will begin: configure the artifact by illuminating all the crystals. To achieve this, rotate the artifact with the arrow and turn its edges by pressing on them.
Follow the dialogues to see the ending.
That’s it for now in this Lost Lands 11 Chapter 2 Walkthrough. You can read the Chapter 3 Walkthrough here.
Related: